Little Kitchens day 3
When I say day three, it’s more like week 3, but you get what I mean.
Visit my previous posts to see how the kitchen started (as an old bedside cabinet).
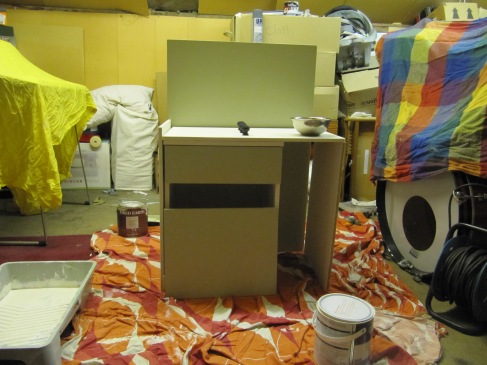
i removed the door, nasty handles and hinges from the cabinet and filled in the holes with wood filler.
I sanded the cabinet and the sheets of MDF with an electric sander (I did it in the loft but opened all the veluxes and wore a mask…. MDF is nasty). It was important to sand the cabinet as it was veneer which is shiny and doesn’t paint easily. The MDF was pretty sharp on the corners and edges so I round them all off with the sanders too, to make it safer and to seal the cut edges so the paint wouldn’t soak straight in.
I primed all the pieces and the cabinet with a primer designed for laminate and veneer (the type you get for kitchen cupboards) to ensure as much as possible that the paint would adhere.
I then went on another B&Q shopping spree to buy paint and knobs. Couldn’t believe the price of paint, and after spending a long time choosing a colour scheme (I had settled for orange and grey), I realised it would be much more economical to go for colours I already had in the house, so have used a gooseberry green in 2 shades (which we used to paint Nina’s nursery). Applying it with a roller gave a really good finish, I ended up giving 4 coats and used about half a tin of each. Hope it doesn’t need touching up at any point because I’ve drained the tins!! Then I applied a varnish with a roller to make it more durable. 2 layers of varnish seems to be acceptable!
I chose some simple wooden knobs from B&Q and a stainless steel handle. I got a stainless steel bowl from Poundland for 50p. ( Well it was 2 for £1 but I’m using the other one in my real life kitchen!)
I sprayed the knobs with black matt paint and varnished them, then drilled 4 holes in the top sheet of MDF and attached the knobs. I put a felt washer between the knobs and the MDF so that they could turn around (like cooker hob dials).
I did the same on the front of the drawer as oven dials and added the stainless steel handle as the oven door handle. I also added a magnetic catch to the door as the original catch was broken. If I’d been more adventurous, I could have moved the hinges and have the door open downwards like a real oven, but I struggled with how to stop it falling open and hurting toddlers, so left it as a side opener.
I had to get my dad to jigsaw a hole in the MDF for the sink – too scared!! I then used silicon to fix the bowl in place.
The hobs are cork drinks coasters sprayed matt black and stuck on with a blog of araldite.
The tap is a piece of copper pipe, sprayed black and bend round. The taps are the same as the hob dials.
I still have the side piece and shelving to paint up and attach. I’m using those white joinery blocks you use for kitchen cabinets to hold it all together.
Final pictures to follow very soon!




super stuff … looks the part completely